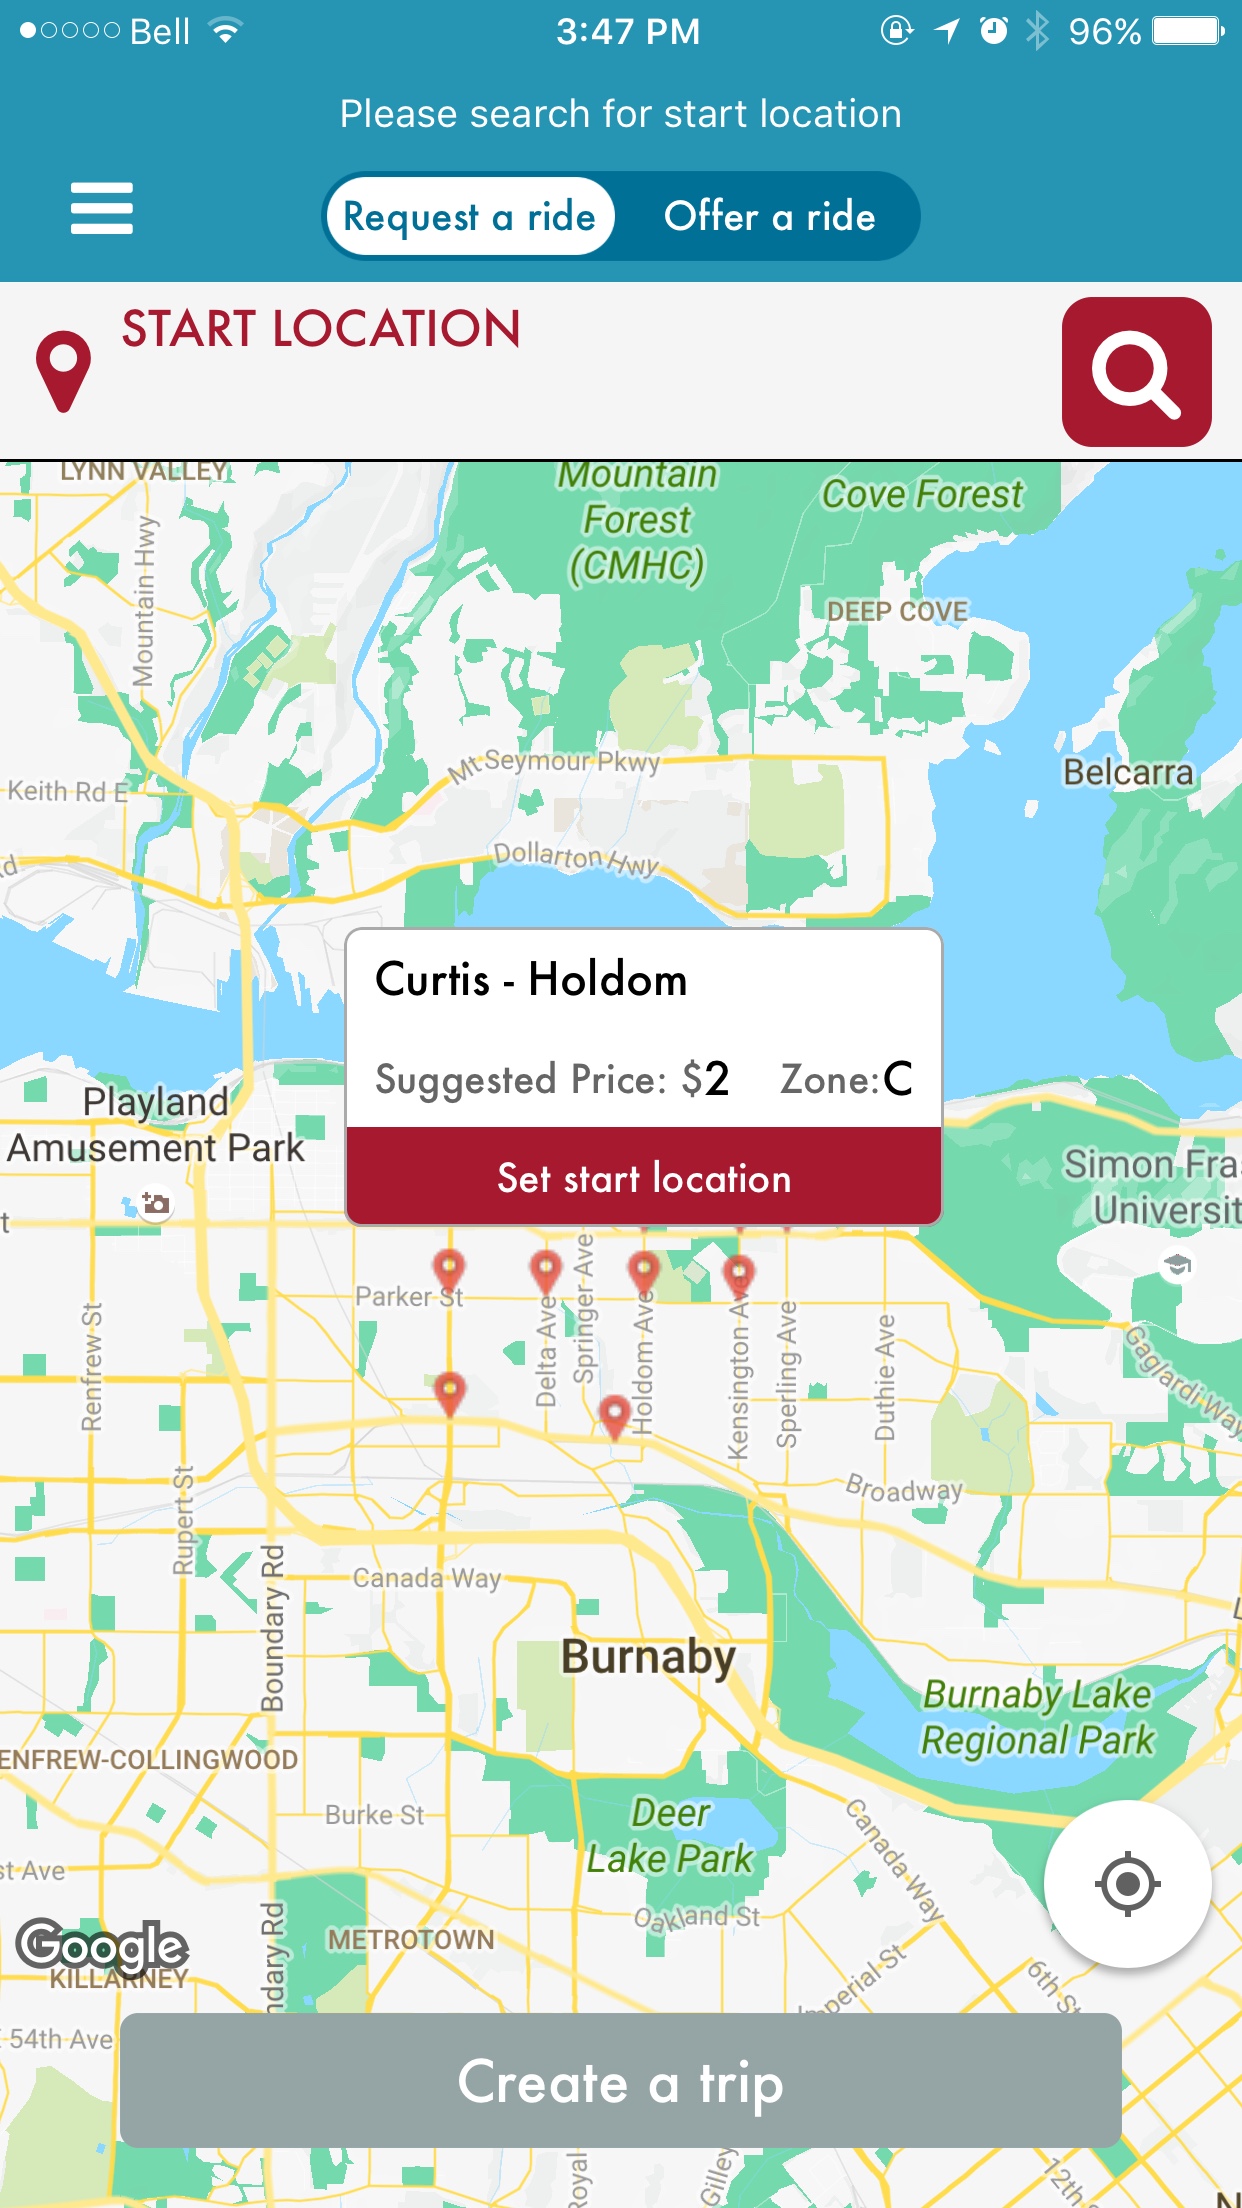
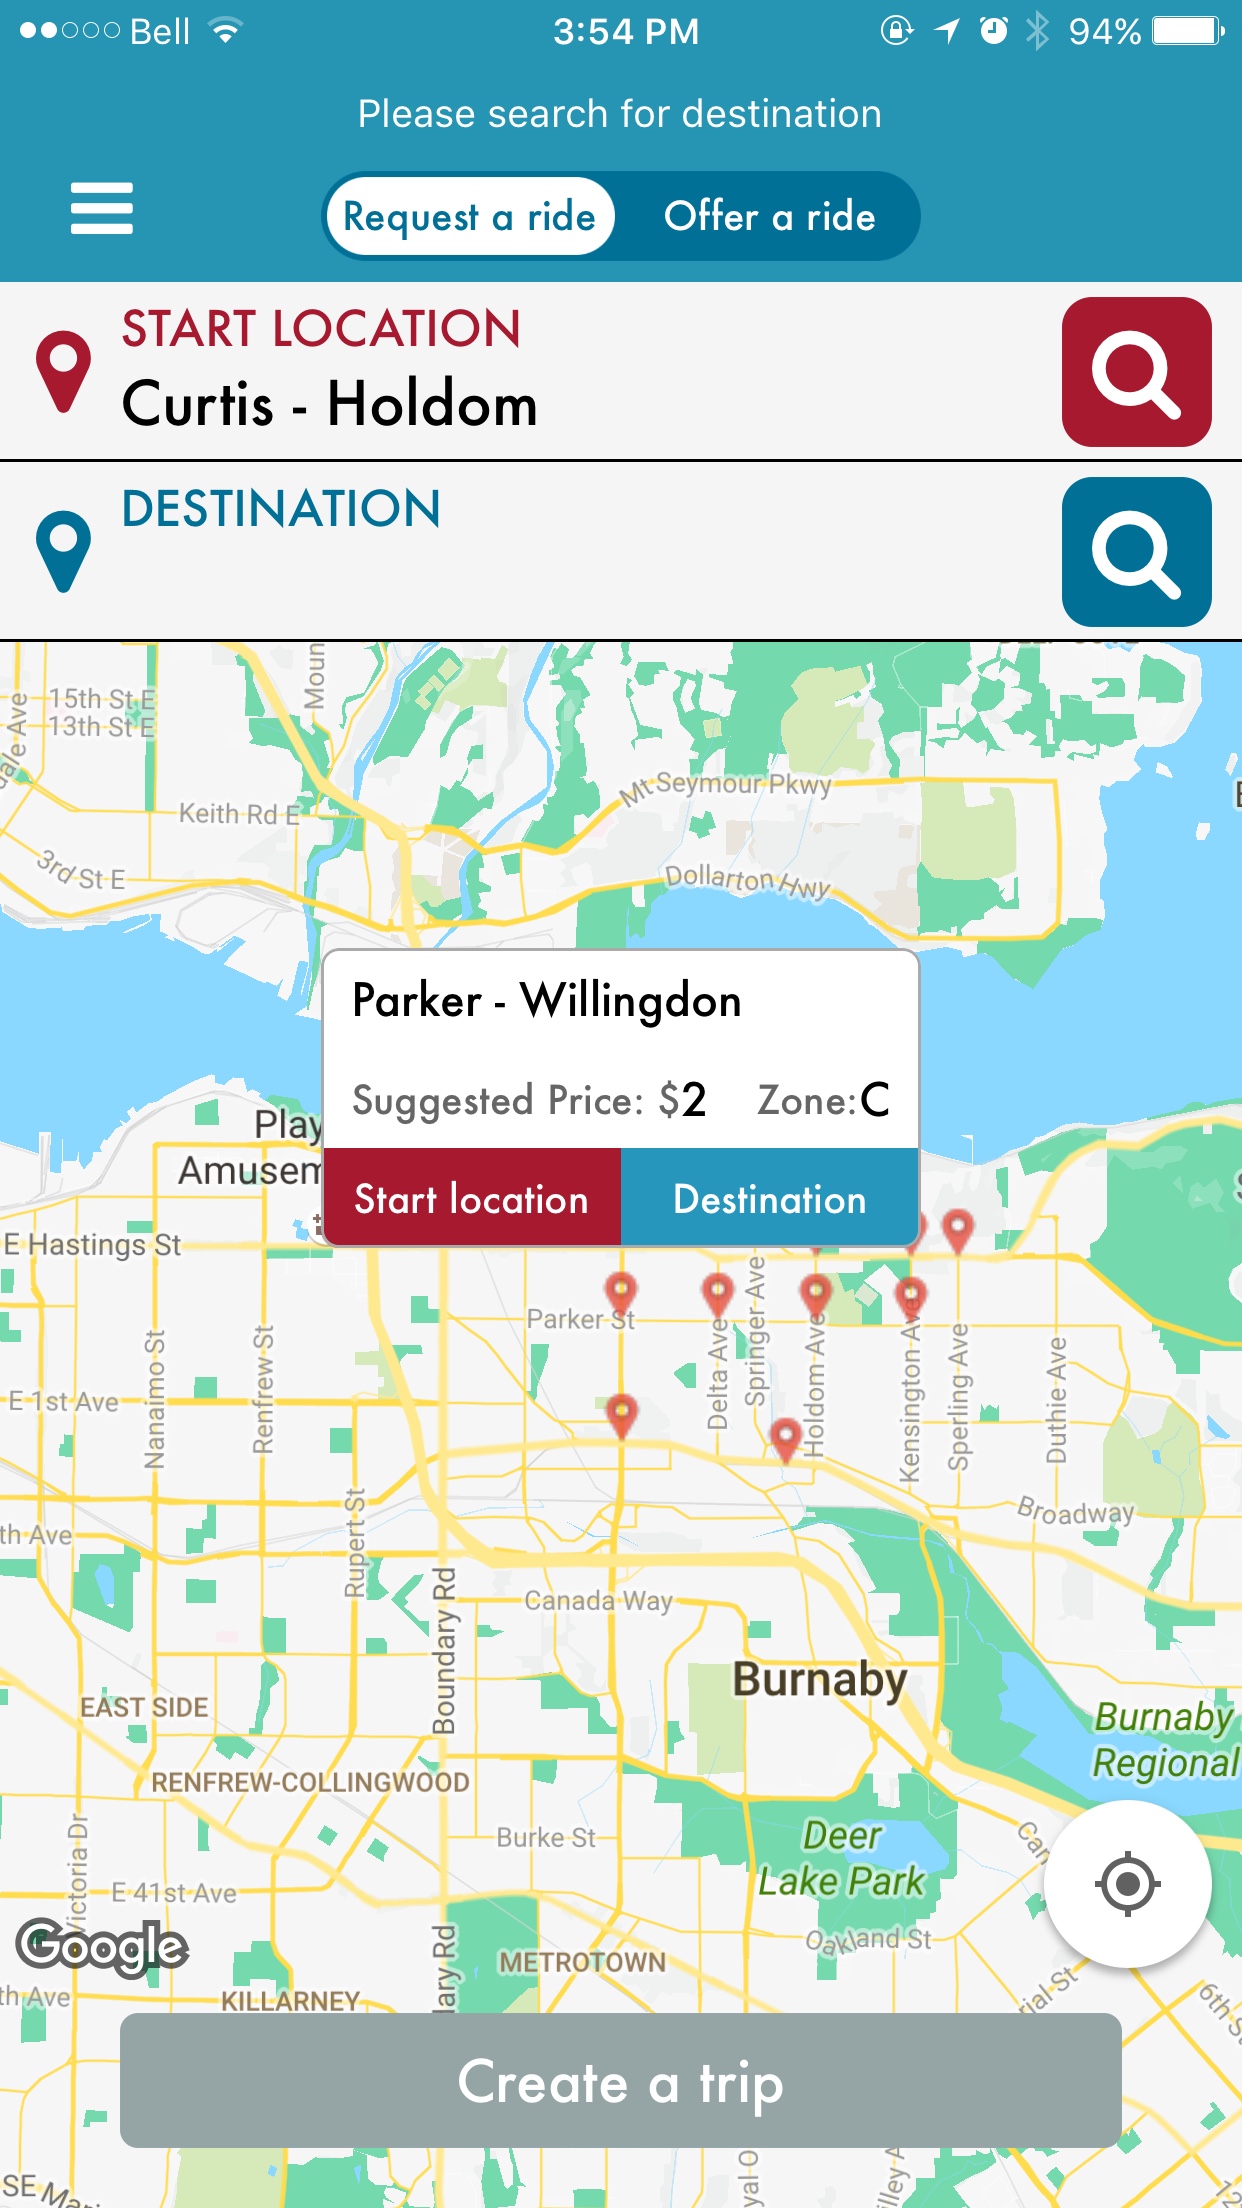
Recently I am working on an IOS app called SFU Commute, it contains a map view that will display a bunch of location markers, we want to customize the marker as well as the infowindow, becuase obviously google map looks bad we want the components to fit in the app style.
Our prototype looks like this:


Then, I looked at documentation of GMSMapView delegate about custom infowindow. It states that:
func mapView(_ mapView: GMSMapView, markerInfoWindow marker: GMSMarker) -> UIView? {
  // Called when a marker is about to become selected,
  // and provides an optional custom info window to use
  // that marker if this method returns a UIView.
}
Oh, nice! Let’s just use this delegate method to create the UIView of the infowindow.
(Heads up: Don’t try, it won’t work!)
So I added the delegate:
class MapView: UIViewController, GMSMapViewDelegate {And return a custom class mapMarkerInfoWindow(a subclass of UIView) like this:
func mapView(_ mapView: GMSMapView, markerInfoWindow marker: GMSMarker) -> UIView? {
  var infoWindow = mapMarkerInfoWindow(frame: CGRect(x: 0, y: 0, width: 200, height: 100))

  //set up information to be shown
  infoWindow.Name.text = (marker.userData as! location).name
  infoWindow.Price.text = (marker.userData as! location).price.description
  infoWindow.Zone.text = (marker.userData as! location).zone.rawValue
  infoWindow.button.addTarget(self, action: #selector(buttonTapped(_:)), for: .touchUpInside)
  return infoWindow
}

func buttonTapped(_ sender: UIButton!) {
  print("Yeah! Button is tapped!")
}
Then the custom infowindow successfully showed up when I tap on the markers. But, when I tap on the buttons inside of the infowindow, nothing happens! Soon, I found out that googlemap renders infowindow as a UIImage, all interactions are discarded before the view gets loaded onto the screen. After that, I searched on google and stackoverflow, I can only find people who ask about this problem but not a real solution for it. :(
(Googlemap delegate provides a tap function to detect tap gesture on infowindow, but the function cannot make the buttons interactive as the whole infowindow is an image, so we need to work around that!)
My Solution
I want to have buttons in the infowindow as it is very important for the workflow of the application, so I decided to find a way to work around it instead of change the design of the app! (Isn’t this what software engineering is all about?)
Because there is no way to make the googlemap’s infowindow to be interactive, I decided to go another route, make my own infowindow. You might be scared that will that be a lot of work? The answer is no.
My solution is basically disable the googlemaps’ infowindow by set it to nil empty UIView object. Create a custom infowindow that is a part of the mapview. It follows the logic:
- Whenever a marker is tapped, use GMSProjection object to map the location coordinates to a point on screen, render the custom infowindow on the point on screen. So it looks like a corresponding infowindow is poped up.
- Whenever the camera view is changed (i.e. user drags or zooms in the map), get the new point of the marker and move the infowindow to where the marker is at. So the infowindow will always be on top of the marker.
- Take care of the open/close actions of the custom infowindow.
- Remeber to keep the marker and infowindow object.
// initialize and keep a marker and a custom infowindow
    var tappedMarker = GMSMarker()
    var infoWindow = mapMarkerInfoWindow(frame: CGRect(x: 0, y: 0, width: 200, height: 100))

    //empty the default infowindow
    func mapView(_ mapView: GMSMapView, markerInfoWindow marker: GMSMarker) -> UIView? {
        return UIView()
    }

    // reset custom infowindow whenever marker is tapped
    func mapView(_ mapView: GMSMapView, didTap marker: GMSMarker) -> Bool {
        let location = CLLocationCoordinate2D(latitude: (marker.userData as! location).lat, longitude: (marker.userData as! location).lon)

        tappedMarker = marker
        infoWindow.removeFromSuperview()
        infoWindow = mapMarkerInfoWindow(frame: CGRect(x: 0, y: 0, width: 200, height: 100))
        infoWindow.Name.text = (marker.userData as! location).name
        infoWindow.Price.text = (marker.userData as! location).price.description
        infoWindow.Zone.text = (marker.userData as! location).zone.rawValue
        infoWindow.center = mapView.projection.point(for: location)
        infoWindow.button.addTarget(self, action: #selector(buttonTapped(_:)), for: .touchUpInside)
        self.view.addSubview(infoWindow)

        // Remember to return false
        // so marker event is still handled by delegate
        return false
    }

    // let the custom infowindow follows the camera
    func mapView(_ mapView: GMSMapView, didChange position: GMSCameraPosition) {
        if (tappedMarker.userData != nil){
            let location = CLLocationCoordinate2D(latitude: (tappedMarker.userData as! location).lat, longitude: (tappedMarker.userData as! location).lon)
            infoWindow.center = mapView.projection.point(for: location)
        }
    }

    // take care of the close event
    func mapView(_ mapView: GMSMapView, didTapAt coordinate: CLLocationCoordinate2D) {
        infoWindow.removeFromSuperview()
    }
Now, we have complete control over the custom infowindow, you can add buttons, labels, and whatever you want on the custom infowindow!
Downside of my solution is that if you have navigation bar on top of the screen, and possibly prompt in the navigation item, there exists an offset y value for the infowindow, so the infowindow is not right on top of the marker, we need to bypass this problem by manually correct the offset.
  // you need to determine this possible offset
  // for me it was 80
  infowindow.center.y += 80